GitHub Actionsの使い方

Github謹製のCD/CIツールとしてGitHub Actionsを使ってみましたのでメモを残します。

今回テストしたGithubは、
①githubのソースコードを含めたコンテナイメージ化
②コンテナイメージをGCR(Google Container Registry)にアップロード
③GCRよりGKE上のkubenetesにデプロイ
④部分的にチャットワークにメッセージ送信
の4つです。

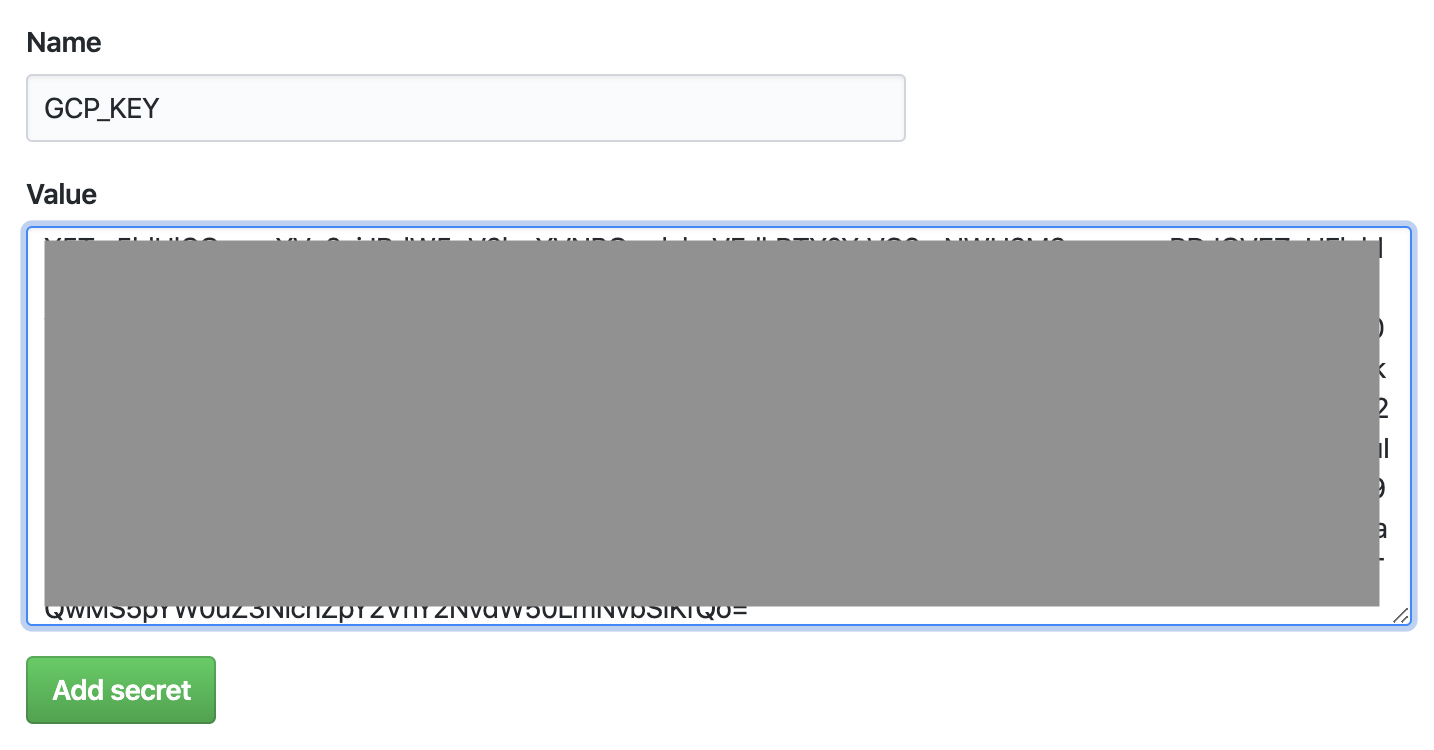
GCPのcredential.jsonをGithubのSercretに登録する

GCPを触るので、事前に取得した認証ファイルを使うことになりますが、リポジトリ内に認証ファイルを上げずに、githubのsercretに登録します。
jsonファイルの中身をそのまま貼り付けるのではなく、base64エンコード形式で貼る必要があります。

bast64 xxxxx.json #認証ファイル

GithubActionファイルの作成

Actionメニューより、NewWorkFlowを選択します。

以前の情報を見ると、初期の頃はビジュアライズなインターフェースで作成が出来たようですが、今はYAML形式での記載になります。
今回は、Docker imageのテンプレートを選びます。

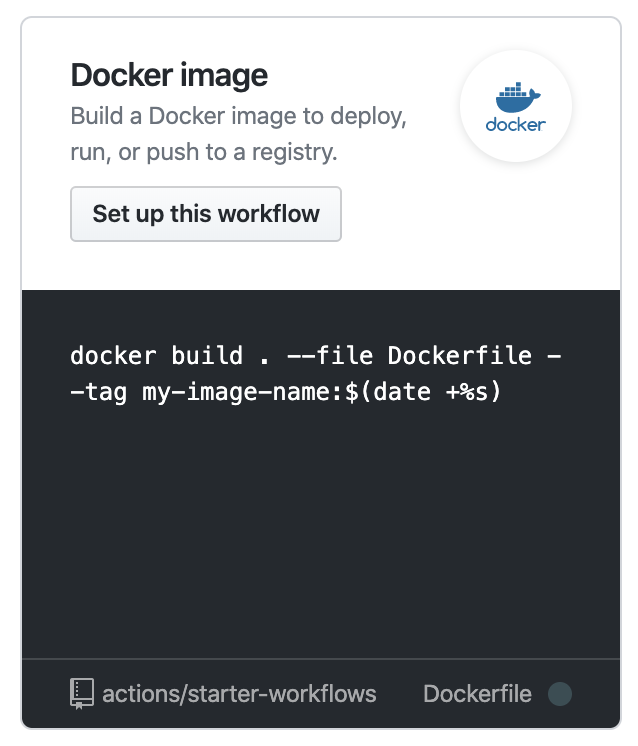
リポジトリの/.github/workflows/dockerimage.ymlとしてテンプレートが挿入されるので、以下のようにカスタマイズします。

name: Docker Image CI

# CI/CDのトリガーになる動作を指定
# 以下はmasterブランチが変更されたら...
on:
  push:
    branches:
      - master

jobs:
  build:
    # CIで使うベースイメージ?
    runs-on: ubuntu-latest

    steps:
    # ベースイメージにリポジトリをcloneする 
    - uses: actions/checkout@v1

    # チャットワークにgit logの内容を送信する
    - name: Send cahtwork from gitlog
      env:
        ROOM_ID: xxxxxxxx
        API_TOKEN: xxxxxxxxxxxxxxx
        REPO_NAME: 'test repo'
      run: |
        git log --numstat -m -1 --date=iso --pretty='[%ad] %h %an : %s' > gitlog.txt
        curl -s -X POST -H "X-ChatWorkToken: ${API_TOKEN}" -d "body=[info][title]${REPO_NAME}[/title]`cat gitlog.txt`[/info]" "https://api.chatwork.com/v2/rooms/${ROOM_ID}/messages"

    # Docker buildを実行
    - name: Build the Docker image
      run: docker build -f Dockerfile . -t {タグ}  #リポジトリ直下にDockerfileを置いています

    # イメージにタグを付ける
    - name: Tagging Docker
      run: docker tag {タグ} gcr.io/{プロジェクトID}/{タグ}:latest

    # 
    - name: gcloud auth
      uses: actions/gcloud/auth@master
      env:
        GCLOUD_AUTH: ${{ secrets.GCR_KEY }}

    - name: Upload to GCS
      env:
        PROJECT_ID: skyticket-devel-161401
        GCLOUD_AUTH: ${{ secrets.GCR_KEY }}
        GOOGLE_APPLICATION_CREDENTIALS: ./service-account.json
      run: |
        export CLOUD_SDK_REPO="cloud-sdk-$(lsb_release -c -s)"
        echo "deb http://packages.cloud.google.com/apt $CLOUD_SDK_REPO main" | sudo tee -a /etc/apt/sources.list.d/google-cloud-sdk.list
        curl https://packages.cloud.google.com/apt/doc/apt-key.gpg | sudo apt-key add -
        sudo apt-get update
        sudo apt-get install google-cloud-sdk
        echo ${GCLOUD_AUTH} | base64 --decode > ${GOOGLE_APPLICATION_CREDENTIALS}
        cat $GOOGLE_APPLICATION_CREDENTIALS | docker login -u _json_key --password-stdin https://gcr.io
        gcloud auth activate-service-account --key-file $GOOGLE_APPLICATION_CREDENTIALS
        gcloud config set project ${PROJECT_ID}
        gcloud docker -- push gcr.io/${PROJECT_ID}/sky_scrayping/sky_scrayping:latest

    # GKEにデプロイ
    - name: Deploy Kubenetes
      env:
        cluster_name: test-cluster
        cluster_ip: xx.xx.xx.xx
      run: |
        kubectl config set-cluster ${cluster_name} --server=http://${cluster_ip}
        kubectl config set-context ${cluster_name}
        gcloud container clusters get-credentials ${cluster_name} --zone=us-west1-a

        # kubenetest のマニフェストはmanifest/dev.ymlに置いており、
        # deployを強制する為にマニフェストの一部を置換しています。
        sed -i -e "s/annotations_reloaded-at/`date  +%s`/g" manifest/dev.yml
        kubectl apply -f manifest/dev.yml

    # チャットワークにデプロイ完了の通知する
    - name: Send cahtwork from Deploy
      env:
        ROOM_ID: xxxxxxxx
        API_TOKEN: xxxxxxxxxxxxxxx
        REPO_NAME: 'test repo'
        BODY: '開発環境のデプロイが完了しました'
      run: |
        curl -s -X POST -H "X-ChatWorkToken: ${API_TOKEN}" -d "body=[info][title]${REPO_NAME}[/title]`echo -e ${BODY}`[/info]" "https://api.chatwork.com/v2/rooms/${ROOM_ID}/messages"

    # Actionが失敗した時はチャットワークにデプロイ失敗の通知する
    - name: error notification
      if: failure()   # これ重要
      env:
        ROOM_ID: xxxxxxxx
        API_TOKEN: xxxxxxxxxxxxxxx
        REPO_NAME: 'test repo'
        BODY: '開発環境のデプロイが失敗しました\n詳細はgithubActionのステータスを参照してください'
      run: |
        curl -s -X POST -H "X-ChatWorkToken: ${API_TOKEN}" -d "body=[info][title]${REPO_NAME}[/title]`echo -e ${BODY}`[/info]" "https://api.chatwork.com/v2/rooms/${ROOM_ID}/messages"

一度定義したenvは他の場所でも参照出来ると思います。

GCPのstartupスクリプトでどハマりしたメモ

VM インスタンスの特別な構成これ通りにNATゲートウェイを構築しようとして、ハマった箇所のメモ

実行したコマンドは以下の通り
開発環境なので、一部は手動でコマンドを置き換えています

# startup.sh取得
gsutil cp gs://nat-gw-template/startup.sh .

# インスタンステンプレート作成(nat-1)
gcloud compute instance-templates create nat-1 \
    --image-family=centos-7  --tags natgw \
    --image-project=centos-cloud \
    --machine-type n1-standard-1 --can-ip-forward \
    --metadata-from-file=startup-script=startup.sh --address グローバルIPアドレス1

# インスタンステンプレート作成(nat-2)
gcloud compute instance-templates create nat-2 \
    --image-family=centos-7 --tags natgw \
    --image-project=centos-cloud \
    --machine-type n1-standard-1 --can-ip-forward \
    --metadata-from-file=startup-script=startup.sh --address グローバルIPアドレス2

# ヘルスチェック作成
gcloud compute health-checks create http nat-health-check --check-interval 2 \
    --timeout 1 \
    --healthy-threshold 1 --unhealthy-threshold 2 --request-path /health-check

# インスタンスグループ作成(nat-1)
gcloud compute instance-groups managed create nat-1 \
    --size=1 --template=nat-1 --zone=asia-northeast1-a

# インスタンスグループ作成(nat-2)
gcloud compute instance-groups managed create nat-2 \
    --size=1 --template=nat-2 --zone=asia-northeast1-a

# ルート作成(nat-1)
gcloud compute routes create nat-1 --destination-range 0.0.0.0/0 \
    --tags noip --priority 800 --next-hop-instance-zone asia-northeast1-a \
    --next-hop-instance nat-1-5h46 \
    --network=default

# ルート作成(nat-2)
gcloud compute routes create nat-2 --destination-range 0.0.0.0/0 \
    --tags noip --priority 800 --next-hop-instance-zone asia-northeast1-a \
    --next-hop-instance nat-2-r3kn \
    --network=default

これで、ネットワークタグ「noip」を付けたインスタンスのルートがnat-1 / nat-2 を通って出て行くはず

 while :; do sleep 1 ;date; curl httpbin.org/ip --connect-timeout 1 ; done

2018年 11月 12日 月曜日 18:50:03 JST
curl: (28) Connection timed out after 1005 milliseconds
2018年 11月 12日 月曜日 18:50:05 JST
curl: (28) Connection timed out after 1005 milliseconds
2018年 11月 12日 月曜日 18:50:07 JST
curl: (28) Connection timed out after 1005 milliseconds

ダメじゃん

内容を確認すると、startup.shに記載されている

echo 1 > /proc/sys/net/ipv4/ip_forward

が実行されていない。

何これ?何で?と思いつつ数時間調べたけど、結局原因わからない。

理由は分からないけど、startup.shに

#!/bin/bash
timedatectl set-timezone Asia/Tokyo (追加)
echo 1 > /proc/sys/net/ipv4/ip_forward
iptables -t nat -A POSTROUTING -o eth0 -j MASQUERADE

したらecho 1 > /proc/sys/net/ipv4/ip_forwardも動くようになった。
改行コードか?

時間を無駄にした

GCEインスタンスでpostgresqlをフェイルオーバーさせる

GCEでは、単一インスタンスに同一ネットワークのIPアドレスを複数持たせる事ができない。
複数のネットワーク インターフェースの概要と例

つまり、Virtual IPを同一セグメントに持たせた構成は出来ない。

クラスタを組みたかったけど、今回の要件としては

1. Active/Standbyの構成にする
2. Activeのpostgresが止まった場合、Standbyを昇格する
3. フェイルバックは行わない。
4. フェイルオーバー後、App側で検知。
   必要な設定変更後、動的にサービスの再起動を行う。
5. 1分以内にサービスが復旧される。

とシンプルな構成にする。

PostgreSQL

要件1、2には、pg_keeperを使う。
クラスタでは無いのでスプリットブレインの検知などは出来ない。
その為、アプリケーション側に今のActive機の情報を教える必要がある。

スプリットブレイン対策用のDB、Table作成

postgres=#  create database pg_state;
postgres=#  create table failover_log (unixtime int, host varchar(10));

インストール(Actice/Standby共に)

cd /usr/local/src

git clone https://github.com/MasahikoSawada/pg_keeper.git

export PATH=/usr/pgsql-9.6/bin/:$PATH

make USE_PGXS=1

make USE_PGXS=1 install

postgresql.conf書き換え(Actice/Standby共に)

vim postgresql.conf

shared_preload_libraries = 'pg_keeper'
pg_keeper.my_conninfo = 'host=10.0.0.10 port=5432 dbname=postgres'
pg_keeper.partner_conninfo = 'host=10.0.0.11 port=5432 dbname=postgres'
pg_keeper.keepalive_time = 2
pg_keeper.keepalive_count = 3
pg_keeper.after_command = 'sleep 1 ; psql -d pg_state -c "insert into failover_log values(`date +%s`, \'`hostname`\');" -x'

Activeが止まった場合、pg_keeper.keepalive_time秒 × pg_keeper.keepalive_count回 チェックを行い、全てNGの場合にフェイルオーバーを実行し、最後にpg_keeper.after_commandの内容が実行される。
今回は、フェイルオーバー後に[unixtimestamp, hostname]を pg_state.failover_logに入れている。

app側

これはアプリケーションのよるので参考まで。
monitor_master_db.pyというモニタリングスクリプトを作成し、root権限で動かす事にした。
動きとしては、Active/Standby両機のDBのpg_state.failover_logをチェックし、タイムスタンプが若い方をDB接続先として、設定ファイル(yaml)を書き換えデーモンの再起動を行う。

#!/bin/env python3

import os,sys
import yaml
import psycopg2
import codecs
import subprocess

yaml_file = '/PATH/TO/env.yaml'
dbs = ['postgresql://postgres@db01:5432/pg_state'
         ,'postgresql://postgres@db02:5432/pg_state']

def get_item():
    arr = []
    for db in dbs :
        try:
            dbcon = psycopg2.connect(db)
            cur = dbcon.cursor()
            cur.execute('select * from failover_log order by unixtime desc limit 1')
            result = cur.fetchone()
            cur.close()
            dbcon.close()
            arr.append(result)
        except :
            pass
    if len(dbs) == len(arr):    # Active/Standby共にデータ取得成功
        if arr[0][0] > arr[1][0]:
            return arr[0][1]
        else :
            return arr[1][1]

    else :                             # 片系が停止している
        return arr[0][1]


def overwrite(db_name):
    with codecs.open(yaml_file, 'r', 'utf-8') as read :
        env_dict = yaml.load(read)

        if env_dict['db_master'][0]['address'] != '{}:5432'.format(db_name) or env_dict['db_slave'][0]['address'] != '{}:5432'.format(db_name):
            env_dict['db_master'][0]['address'] = '{}:5432'.format(db_name)
            env_dict['db_slave'][0]['address'] = '{}:5432'.format(db_name)

            with codecs.open(yaml_file, 'w', 'utf-8') as write :
                yaml.dump(env_dict, write, encoding='utf8', allow_unicode=True, default_flow_style=False)

            try:
                subprocess.check_call(["systemctl", "restart", "デーモン"])
            except :
                pass

作成したmonitor_master_db.pyをcronで動かす。
cronは普通に書くと1分が最小の実行単位だが、以下のように書くと5秒単位でスクリプトを実行してくれる。

# 5秒間隔
* * * * * for i in `seq 1 12`;do sleep 5; python3 /usr/local/bin/monitor_master_db.py; done

# 10秒間隔の場合
* * * * * for i in `seq 1 6`;do sleep 10; python3 /usr/local/bin/monitor_master_db.py; done

この状態で、Active側のDBを落として、フェイルオーバーされApp側の接続先も変更される事を確認する。
Slave側が昇格前にfailover_logへのinsertが実行される場合、pg_keeper.after_commandのsleepを大きくする。

pg_keeper.after_command = 'sleep 5 ; psql -d pg_state -c "insert into failover_log values(`date +%s`, \'`hostname`\');" -x'

Google Cloud Storageを公開する

ACLの確認

gsutil acl get gs://バケット名

レスポンス
[
  {
    "entity": "project-owners-xxxxxxxxxxx",
    "projectTeam": {
      "projectNumber": "xxxxxxxxxxx",
      "team": "owners"
    },
    "role": "OWNER"
  },
  {
    "entity": "project-editors-xxxxxxxxxxx",
    "projectTeam": {
      "projectNumber": "xxxxxxxxxxx",
      "team": "editors"
    },
    "role": "OWNER"
  },
  {
    "entity": "project-viewers-xxxxxxxxxxx",
    "projectTeam": {
      "projectNumber": "xxxxxxxxxxx",
      "team": "viewers"
    },
    "role": "READER"
  },
  {
    "entity": "allUsers",
    "role": "READ"
  }
]

全ユーザーにデータ書き込みを許可する

gsutil acl ch -u AllUsers:R gs://バケット名

レスポンス
Updated ACL on gs://バケット名/

全ユーザーにデータ読み込みを許可する

gsutil acl ch -u AllUsers:W gs://バケット名

レスポンス
Updated ACL on gs://バケット名/